|
 |

|  |
I've learned a good amount of information about how to photograph jackets, but I'm not a professional
nor have I had any formal training. I'm a graphic designer by trade, so I do have an eye for what an image
should look like. I started this project with disposable cameras, and the results were as one could expect.
Later I used a nice Kodak digital camera, and then a very inexpensive HP (I even had to use a scanner for the detailed
images, as the camera wouldn't focus too closely). I've since been using a Minolta Dimage Xt
for the last two years, and it's done well for what I need.
First, having a good camera is ideal. There are a number of digital cameras which would be just fine for anyone wanting to
get clean shots of their jackets. I use the camera mentioned above, a Minolta DiMage Xt, which is now two years old. It has 3.2
megapixels, and 3X zoom. This is enough for me, though far better cameras are available, with commensurate pricing.
I believe that taking images for viewing on a computer can be done with a lower level camera, one in the $100 range, now that
cameras are getting so inexpensive. Any camera with 3.2 megapixels or higher in size should do just fine.
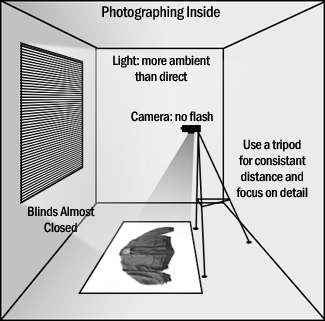
Experience has lead me to believe that natural lighting is best, so I've been using natural lighting
as much as possible. The best lighting I've found is ambient, rather than direct sunlight. My old office was
a great photography studio - all I had to do was use a row of three empty cubicle work areas that were next to a
long set of windows. I would place the jackets on the floor, about five feet from the window with a white sheet of paper underneath, the collar
pointing towards the window. I would then close the blinds just enough that there was no direct sunlight coming in, but
only ambient lighting.
Another good environment to photograph jackets is when it's cloudy outside. In this case, I just find a good open area
in a place like a parking lot and use the white background on the ground. The lighting can be excellent, just like the
environment mentioned above.
It's always good to use a tripod as well. I find that the level of detail will always be better, and tripods are as inexpensive
as $20 at local chain stores. Also, you will have consistent height from the jacket and it's details when this is done.
It will take some experimentation to get this all done well, but little adjustments will help to see what works best.
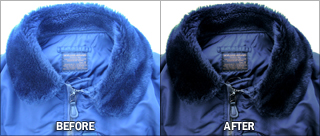
The truth be known, I really spend most of my time on the photos using Adobe Photoshop. This is a photo editing program, and I
am trained in how to use it. The raw images that I get from my camera can be quite off in both color and light balance,
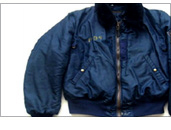
so I adjust these, sometimes quite heavily. For instance, my camera has trouble with blue nylon, and the photos
often come out looking too bright, so I have to color adjust to get them to look accurate.
There are a number of photographic editors out there, and there's no need to spend so much on one program. However,
one can get an older version of Photoshop such as 5.5 for a very low price on eBay for less than $100. Though this is an older
program, it's got all that one would need to do fantastic editing of images.
The greatest tool I've had to take these photos is practice - I've toyed with many different ideas on how to photograph the jackets
and new ideas were necessary once I left the job with the great office area. One can tell quite easily from these photos the skill
level I had achieved, as the earlier photos are done with a flash, or the camera is too far from being over the jackets. At one point
I decided to white out the backgrounds of the standing images. This has been the one detail of photography that's been the
hardest to finish - it takes a long time to "paint" over the backgrounds, but the results make for a much more simple and easy to view photo.
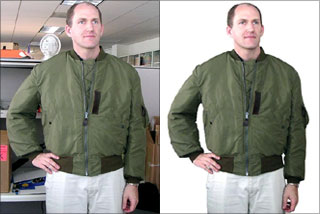
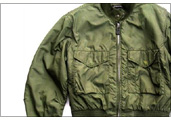
I used Photoshop's Polygonal Lasso Tool to remove the background color from this photo
Hopefully if you take up photographing your own jackets it will be as rewarding as it has been for me.
|
 |
   |
 |
|